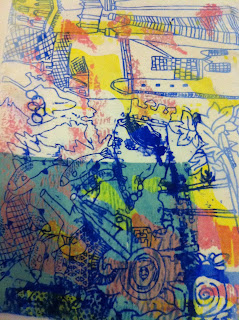
DAY1. We made out screens which was a really long process. We had to wash our screens, put a layer of cleaning fluid on it then jet wash this off and the last screen comes of the screen, then dry this in the heat cupboard. Next put emullsion on it leave for 30mins. Then we exposed it on the light box, this is a much simpler version i'm writing lots more things inbetween we did! Finally at the end of the day we had our screen ready! We then had a go at doing one print to see if it works, mine was okay I needed to press harder on the squeege to get a better outcome. Some areas of my print came off in the washing process so I had to use tipex to put the stencil back in! See the photos below!
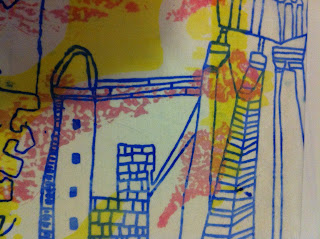
This is a close up of my favourite part of my screen, I love the jumping salmon and the triangles!
DAY2. We learnt how to create pigments today to print with, its quite an easy process and I enjoyed it. You have to make the colour pigment you want and a netural colour then you mix the a little of the pigment with the netural! I did my best two prints on tuesday I love the colour I used and the lines are really crisp and visalbe which I'm really pleased with!
DAY3. Learnt all about pigments and fibres in fabric today, really interesting. Also learnt that there is a crazy incredible tutor in print, maraget. Shes amazing! She taught us all about making dyes to dye fabrics so you have a base to work from. Really interesing. I dyed two pieces of fabric a yellow and a turquoise which is more of a blue now.
DAY4. Discharge today. Its where you put a liquid on your fabric though your screen and you leave a discharge on the fabric and this basically takes about the dye where it went through the screen. Its like a batik really. So I did the discharge let it dry and then you steam it for 10mins and the discharge appears. I did it on the yellow you can slightly see this, and I did it on the black and this worked out really well! On the yellow one I then printed on top of this and I like the effect of the light colours!
The white you can see is the discharge working! woop!
I did this print also, I like the colours but unfortunately the blue line is quite lumpy, thick and ugly but oh well. I tired to cover it up with the green but it juts highlights it a bit more!
This print below is my black discharge, it looks like I've bleached it but its a discharge, if I had more time I'd of tired to print on top of it. Also I steamed this for 45mins and it should have only been in for 10mins deary me, which is why its bleed quite abit.
This print below I quite liked but unfortuately when I washed it, it blead loads and I've lost alot of the colour layers I put on it. It had about four layers of colour and you can just about see two, so I dont know what happened, whether it didnt steam properally or something who knows?


No comments:
Post a Comment